|
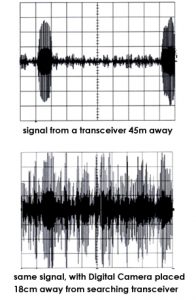
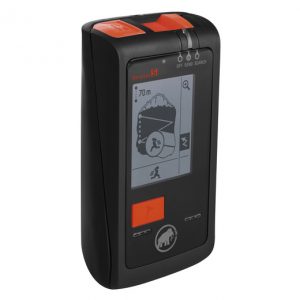
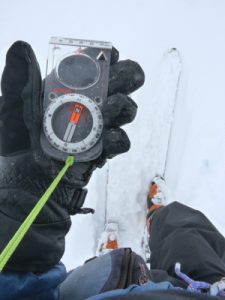
In the modern 24/7 world, most peoples’ lifestyles depend heavily on consumer electronics – and in particular the mobile phone. This presents us with a problem when backcountry skiing, as all electronic devices create electrical interference that can compromise the function of your avalanche transceiver. This is a well known and researched problem, but not many backcountry skiers follow the latest advice – either through lack of education, or an unwillingness to change their personal behaviour (I’ve encountered both amongst off piste skiers!) There are plenty of situations where it might be a good idea, or necessary to use electronic items whilst backcountry skiing – such as a GPS for navigation in poor visibility etc. However, much of the time it’s done out of habit, or it’s a choice. We are all used to switching off phones in a wide variety of educational, work and social situations (meetings, lectures, cinema/theatre etc), so switching your phone off is no big deal. Take it as a chance to escape your digital life for a few hours in a beautiful mountain environment – you can always Tweet/Insta/FB all about it afterwards! Seriously though, if you want to take photos and video, then do so in a safe place and remember to switch your device off fully between shots. Likewise, if you want to check your phone for messages/updates during the day, then do so in a safe place, eg at lunchtime etc and remember to switch your phone off again before resuming skiing. The message is, plan to reduce your use of electronic devices whilst backcountry skiing, only turn them on when needed, always carry them well away from your transceiver and by default, it’s safest to keep them switched off. *NB Off means completely switched off in this instance – airplane mode won’t help here, as it’s the touch screen that causes most interference. **In an avalanche incident, if rescue services are available close by (ie less than 15 minutes away) and you decide to call for a rescue, then it’s Ok to keep one ‘rescue phone’ switched on, so long as you keep this phone well away (100m or more) from the search area – clearly, this decision also removes 1 rescuer from the search. ***Very low power electronic devices (eg flat battery watches) are Ok to wear on the wrist – if the device needs regular recharging however, don’t wear it on your wrist! Cameras – if you want good photos, it’s still best to buy yourself a decent camera, rather than relying on your phone! Lift Passes – these have been tested and found to be Ok. The Problem The first incident where electronic interference from a mobile phone is thought to have contributed to an avalanche fatality occurred in 2000 in the French resort of Pra Loup, when a well trained ski patroller failed to locate a buried colleague after over half an hour of searching. Since then, the effect of interference on avalanche transceivers by consumer electronics, radios and metal objects has been the subject of a number of scientific studies (see references below). If you are interested and of a scientific background, the papers make interesting reading – but to save you wading through it all, the summary findings are that devices with touch screens cause the biggest problems (which in itself is a problem, as practically everything is now going over to touchscreen!) – and most especially, modern smart phones. NB Ski lifts, electrical power lines and approaching storms are also known to cause interference, so you need to be aware of your surroundings too. The Effects The possible effects are summarized below: As a victim: In send (transmit) mode, if you have anything metal, magnetic or electronic too close to your transceiver it can reduce it’s output range by up to 30% – which means the rescuers may need to reduce their search strip width and get closer to you before picking up a signal – ie if you have your phone switched on and get buried in an avalanche, you could be harder to find. As a rescuer: In search (receive) mode, electronic interference is a much bigger issue, as initially the transceiver is trying to pick out a very weak, distant signal from the background noise. Switched on electronic items within 50cm of your transceiver can result in a reduced search range, so you may have to narrow your search strip width and interference can also sometimes create false distance/direction readings or problems with processing multiple burials. So, how to proceed? Well, it might help first if we look at the transceiver manufacturers guidelines, which are based on the findings of this research and their own studies. Transceiver Manufacturers Recommendations All of the major transceiver manufacturers recommend keeping any switched on mobile phone and other electronics, magnets and metal objects at least 20cm away from your transceiver when it’s in send (transmit) mode (ie when skiing) and any switched on electronics and magnets at least 50cm away from your transceiver when it’s in search (receive) mode (ie in a rescue). A lot of people read this casually and think: “Ok, I can keep my phone switched on, so long as I keep it in a pocket well away from my transceiver – problem solved, lets go skiing!” However, it’s not quite as simple as that – as they also advise you to keep electronic items switched off whenever possible whilst off piste skiing. Some of the reasons behind this are explained below: First problem: in reality, it’s not actually possible to keep your phone in a pocket and over 50cm away from your transceiver whilst doing a transceiver search (this has been studied – Orloff, Big Sky Ski Patrol, 2016) To be over 50cm away, your phone needs to be in your rucsac, in which case you might as well switch it off… Second problem: stressed people with infrequent training are forgetful: it’s been found that the average cognitive functioning level of an adult recreational skier faced with an avalanche incident, is that of an 8 year old. Would you 100% trust an 8 year old to remember to switch their phone off along with any other electronic items, before starting a transceiver search? Third problem: Multiple sources of interference add up – so if you are carrying a switched on phone, wearing a GPS watch and using a Gopro action cam, then the combined interference of all these items will be far greater. Also, the combined interference of several team members carrying switched on electrical items during a search can create problems in the final pinpoint search phase, when team members are closer together, preparing to probe and dig. So how big a problem is this? Currently, we’ve identified the problem and how to avoid it, but at the time of writing there aren’t any detailed statistics available regarding the number of fatalities that electronic interference may have contributed towards. What we do know however, is that it was first discovered following a failed transceiver search and a fatality, so it’s definitely a serious issue. Anecdotally, some transceiver models appear more affected by interference than others – so depending on the situation you face, if there is electronic interference present, your transceiver may still take you to the victim, but there’s a chance that it won’t. Given your luck has just run out badly already and the grim statistic is that 50% of fully buried victims are not actually pulled out alive (due not being dug out in time, injury etc) – then you don’t want to shorten the odds even further. Ie a failed transceiver search has a very high consequence (death!) – so although the risk may be small, it’s important to reduce any known factors that may cause a search to fail.. Therefore the clear message is: minimise your use of electronic devices whilst backcountry skiing, only turn them on when needed, always carry them well away from your transceiver and by default, it’s safest to keep them switched off. Latest Transceiver Developments Transceiver manufacturers are well aware of the problem and working to mitigate against the effects of interference problems. Some of the newest transceiver models can now detect interference and warn the user – both the new Baryvox and Baryvox S models from Mammut can do this. If interference is detected by the transceiver, a warning icon, or message is displayed, giving instructions to the user – eg ‘move sources of interference away from the transceiver’, ‘reduce search strip width to 20 metres’ etc. With older models you don’t get any warning if interference is causing a problem – the transceiver either fails to detect a signal when it should, ‘detects’ a false signal where non exists, or gets confused and takes you in the wrong direction… What about Guides and Rescuers? Ski Professionals are not immune from the problem – Guides need to consider how they manage and use electronic devices during the course of their work: for instance, having a ‘phones switched off’ rule within the group, or having just one device switched on for navigation etc. Also for rescue, safety and coordination purposes, many guides/patrollers/rescuers may be required to have radios (but less often phones) switched on at work or during a search or rescue, which clearly throws up problems. An investigation into Ski Patrol radios found that the units being tested produced less interference than smartphones, but their effects still need to be taken into account. Ski professionals already start with high levels of technical experience and search proficiency, so with further training can be taught to identify, manage and overcome interference problems during searches by using alternative techniques (eg by switching to analogue mode in high interference polluted areas etc). If you don’t have an analogue facility on your transceiver (only the top end ‘pro’ models have it) and you aren’t experienced and proficient with analogue search techniques (eg you’ve had professional training, or practice every week) then this is not a viable option for most recreational skiers. My own working protocol As a guide, I brief my group on transceiver interference issues at the start of each weeks skiing and on the first morning, I ask everyone to switch their phones off, so we can do a full transceiver range and function check before going skiing. Despite this, about 2-3 times a year I come across a transceiver that’s exhibiting either reduced search or send range, or I hear unusual amounts of background noise/ghost signals etc when using analogue mode for the range tests. To date, on every single occasion this has happened, the problem has been tracked down to a mobile phone still being switched on in someones pocket, or another electronic device close to the transceiver. Clearly, most people want to take photos/video of their trip – so I ask folk to switch phones off between shots, just like I do with my camera. I also take a lot of photos and video myself, with a good dedicated camera – so that everyone comes away with plenty of good photos of the trip. Reminders after lunch/photo sessions complete the daily routine. I carry a phone/radio/sat phone for communication on all of the ski touring holidays that I guide, but it stays in my pack switched off until needed (in very cold, weather I keep it switched off in a pocket >20cm away from my transceiver – see electronics management notes below). Like technology, working norms and safety protocols evolve over time: for instance, the “put all electronics in your backpack and check that your phone is switched off before starting a transceiver search.” instruction is a new one, in response to the increasing number of touchscreen electronic devices that people now use and wear all the time. Managing Lithium Batteries in Cold Weather All Lithium batteries used in phones and modern electronic devices have reduced capacity and run down more quickly at low temperatures, so keeping them warm and using devices with a larger battery, or carrying spares may be necessary when you are operating in low temperatures. Keeping the device warm and switched off when not in use is the obvious thing to do. For items like cameras; carrying spare, warm batteries in a pocket is also a good plan and for phones in particular, switching to airplane mode massively increases the battery life, as does switching to low power mode and keeping the the screen switched off as much as possible. With regards to transceiver interference; so long as the device is switched off, then you can treat it the same as a metal object – so there’s no problem keeping your phone in a pocket in cold weather to keep the battery warm; just make sure that you carry it >20cm from your transceiver. At -5 to -10C Lithium batteries used in phones, modern GPS units and cameras lose about 15-25% of their capacity (they also run down more quickly when used at low temperatures). Older style, non touch screen GPS units generally work fine at this temperature range. Phones however, are rated for use at specific temperature ranges which can vary between brands and models. This means that some phones are more susceptible to failure in the cold than others. Iphones for instance are rated for use between 0C and 35C, which means they can (and sometimes do!) fail at temperatures of -5 to -10C. Older Samsung phones have been tested and found to work much better than this at lower temperatures – however, I’ve found no test results for their current models. The problem gets worse at progressively lower temperatures: at -20C lithium batteries can lose up to 50% of their capacity and also discharge more quickly. At these temperatures, even a warm smartphone will quickly fail once exposed to the elements, unless it’s well protected and only used for a minute or two. Non touchscreen GPS units fare better at this temperature range, but should still be kept as warm as possible and ideally used intermittently to ‘check and confirm position’ rather than as a primary, continuous navigation tool unless absolutely necessary. Spare warm batteries should always be carried. Some ruggedized ‘tough’ phones on the other hand, are rated down to -20C, so these could be an option to explore for low temperature use. Many people and certainly most Guides, carry power packs on longer trips like skiing the Haute Route, in order to recharge phones and other electrical devices. However, it’s very important to know that you shouldn’t ever recharge a Lithium battery when the battery temperature is below 0C – this is a big no-no, as it will permanently damage the battery (in a worse case scenario, the battery could split and catch fire some time later!) Therefore, if you have a phone or other electronic device that’s died on you whilst on the hill due to the cold, then you absolutely must re warm the device and the power pack first, before plugging one to the other! This also means that you shouldn’t take a cold phone or other device out of your rucsac at the end of the day and start recharging it immediately – you need to re warm the device for a few minutes, so that the battery is above 0C before you start recharging it. There’s plenty of info online explaining the chemistry behind this problem – it’s a well known issue amongst battery scientists, but not the public! On the flip side though, Glenmore Lodge (the Scottish National Mountain Centre) instructors have had some success using power packs as remote battery packs on the hill – ie placing a power pack in a warm inside pocket, then connecting it to a phone in an outer pocket for use on the hill. I’m not sure what this may be doing to the Lithium battery inside the phone at low temperatures (see comments above!) but it has been found to work at typical Scottish winter temps (ie at around, or a few degrees below, freezing). Some Thoughts on Navigation We are fast reaching a tipping point where electronic, GPS based devices are becoming one of the most common means of mountain navigation. GPS is super accurate and many smartphone apps in particular, are very easy to use, even for inexperienced navigators. With the ability to share routes via GPX files and the opportunity to cross reference this information with online avalanche forecasts and terrain maps etc, this technology has great benefits for skier safety when it’s used intelligently. However, when not used intelligently it also has the potential to make things less safe. We’ve all met that clueless, poorly dressed couple getting cold and wet in the mist with an iphone, who would never have gotten so far up the mountain were it not for the phone – and who clearly wouldn’t be able to deal with any problem, or get themselves down safely if the batteries ran out… In poor weather or reduced visibility, if you are only confident enough to follow a particular route because you have a phone or GPS for navigation, then maybe you should ask yourself whether you are making things safer or actually more dangerous – most likely the avalanche risk will be higher, so you need to have done a lot of extra detailed planning and maybe you should be carrying some extra safety kit etc, rather than just relying on the phone. I know guides who’ve fallen into the trap of carrying on ‘because I’ve got a GPS’ and then regretted it, so this is a problem for all of us, not just the inexperienced. There’s a famous story about a German guide explaining to a pushy foreign client why it wasn’t safe to leave the hut in a whiteout: the guy had questioned why the guide couldn’t just use his GPS to navigate safely up the glacier – to which the reply came: “A GPS is for getting yourself out of ze s**t, not into ze s**t!” Apart from transceiver interference, the other issue we’ve talked about with electronics is battery life and in particular, battery reliability at cold temperatures. I could easily use a smartphone or GPS to navigate all of the time (and indeed, many guides do!) – but in most conditions, I personally still choose to use a map and compass for day to day navigation, as it’s great practice and the batteries last a lifetime! On any tour, you should still be carrying a map and compass and know how to use them – and regular practice is the best way to keep your skills up. Personally, I only use of my GPS in situations where I know it will have a positive impact on speed and safety. As I’m quite handy with a map and compass, this means infrequently – but if you need to use yours more often, then clearly make use of it. However, it’s not a good idea to rely solely on your mobile phone as your main (or only!) navigation device – as apart from issues with cold temperatures, you are also running down the batteries on your principle emergency communication device at the same time… Finally – there’s an amazing amount of great avalanche safety information available via smartphone apps and I use them every day, so please make use of this – but be aware that most of this information is best used as a planning tool before you set foot on the mountain. ie it’s not good to be measuring slope angles with your phone, or looking at a phone app ‘danger heat map’ in some critical spot in avalanche terrain, trying to make a ‘go-no go’ decision – the planning and decision making should have been done well before you set foot on the slope! References:Barkhausen “The Effect of External Interference on Avalanche Transceiver Functionality”
Meister and Dammert “Effect of consumer electronics on avalanche transceivers” Genswein, Atkins et al. “Recommendation on how to avoid interference issues in companion and organised avalanche rescue” Orloff “Distance between Electronic Devices and Avalanche Transceivers on a Professional Ski Patrol” Forrer, Muller, Dammert “The Effect of Communication Equipment on Avalanche Transceivers”
1 Comment
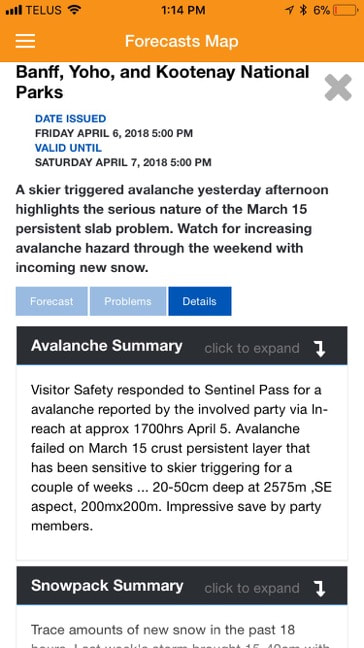
Saturday, November 24, 2018 “Little did I know what was coming,” writes Tim Banfield in this eye-opening and brutally honest account of he and a partner’s successful rescue of a friend that was buried 13 feet deep in an avalanche. Banfield recounts this tale for one reason: to share what he learned from a truly remarkable avalanche rescue in the hope that this information can help save lives. On April 5, 2018, two friends and I were involved in an avalanche incident on Sentinel Pass near Mt Temple in Alberta, Canada. The event has opened my eyes and seemingly the eyes of others into some takeaways that we as winter backcountry travelers can learn from. I’m discussing this because I feel there might be a lesson or a point from this slide that could help someone in the future. Not only is it a compelling story with a very fortunate and happy ending—we pulled off what sounds like one of the deepest companion rescues that most people have heard of—but there are some lessons too. In hindsight, there are things we could have done been better. Just for some background leading up to the avalanche … Most of the winter I was focusing on photographing ice climbing and rock climbing, and not focusing on what was happening in the Canadian Rockies snowpack. The day the avalanche happened was my first ski day of the year. I hadn’t looked at an avalanche forecast in-depth for at least a month and I hadn’t decided to go skiing that day until about 15 minutes before we left. I was supposed to be shooting the ice climb Nemesis, at the Stanley Headwall but decided at the last minute that it would probably be more fun to go skiing than to sit in the snow and take pictures of other people having fun. Little did I know what was coming … With only 15 minutes to get ready I unpacked my climbing gear, repacked my ski gear, checked the avalanche bulletin quickly, grabbed a coffee and jumped in the car with my friends. Here’s what snow safety gear I packed:
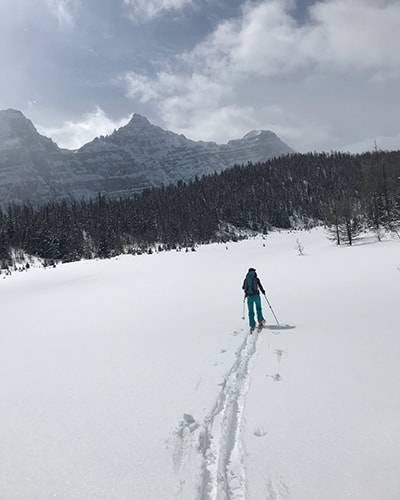
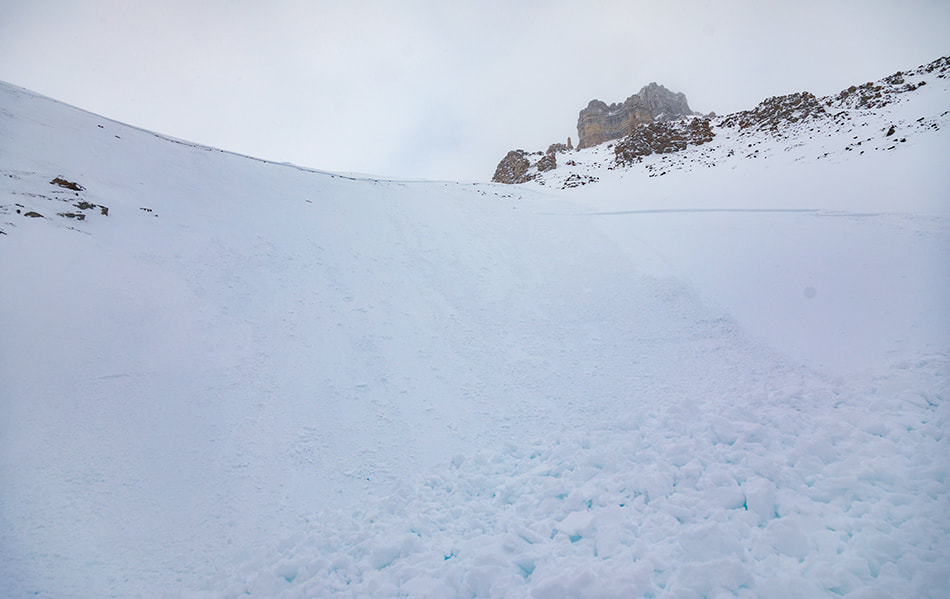
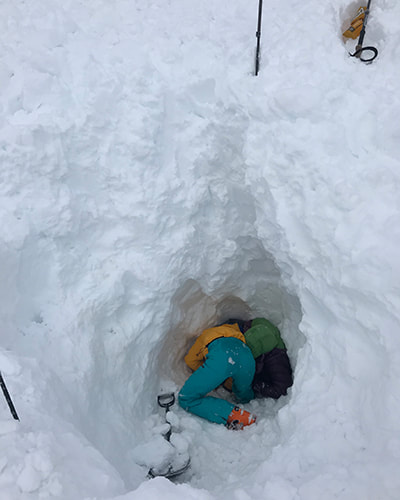
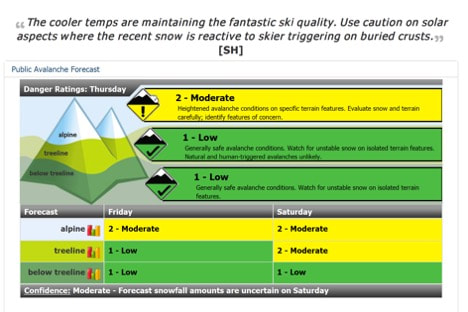
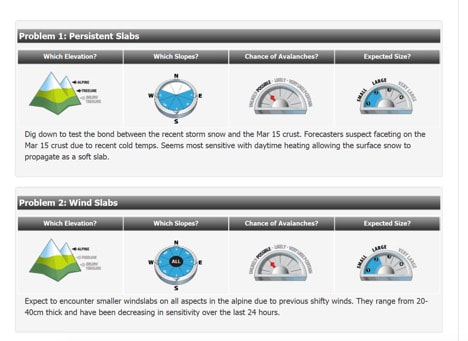
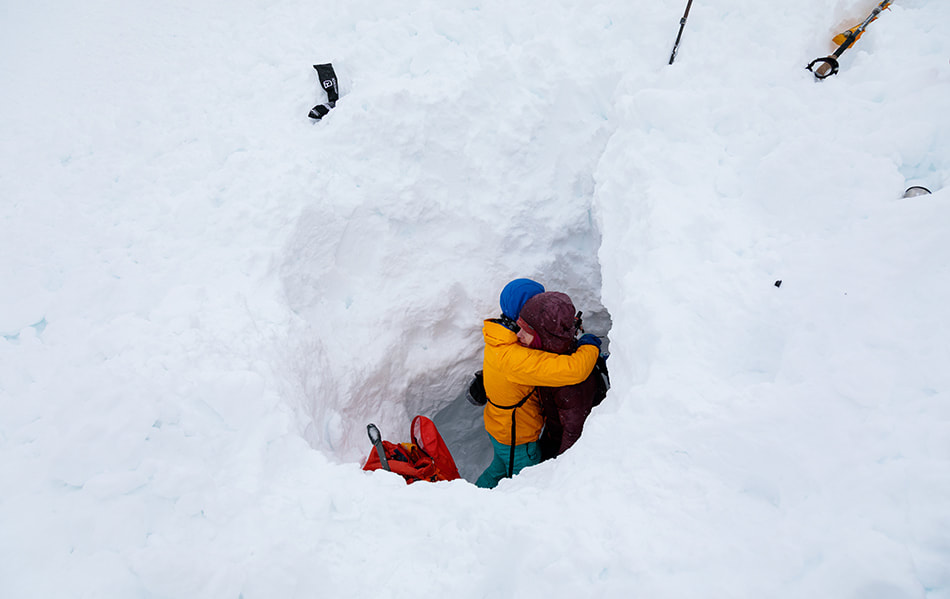
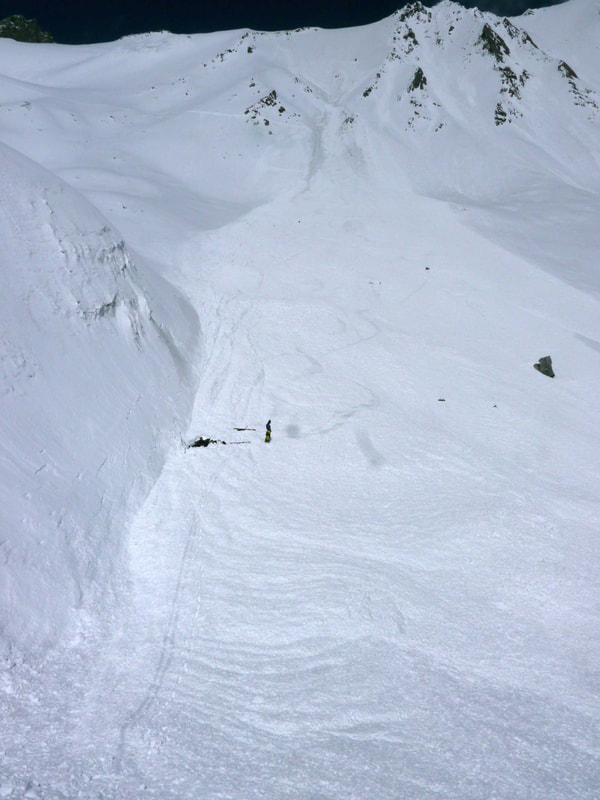
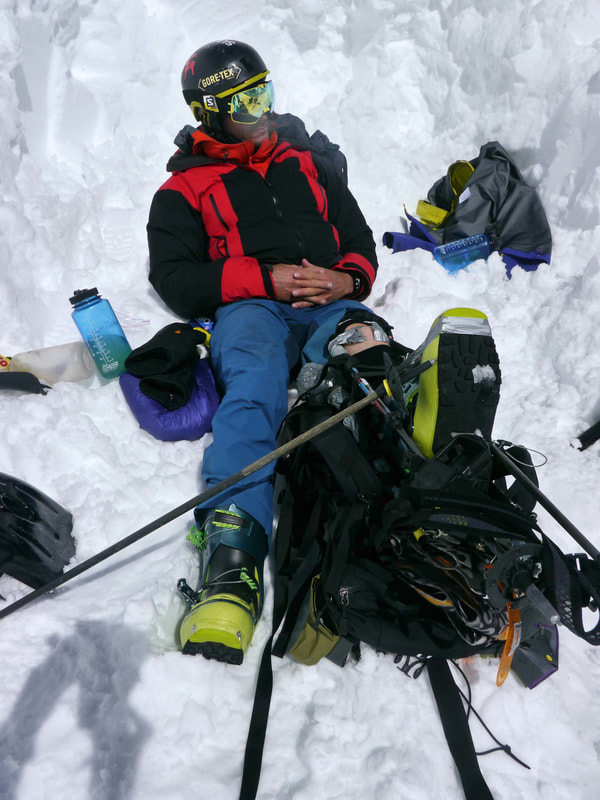
WHERE WERE WE SKIING? The tour we were going on that day was more a mission to look at climbing options in the area vs a day out getting turns. We skied roughly 12km up Moraine Lake road and had a quick snack before starting up the summer hiking trail for Larch Valley. The Larch Valley trail to the top of Sentinel Pass is an additional 6.8km with 735m elevation gain. We were just approaching the top of the pass when I looked down and saw a shooting crack emanate from my ski. I thought, that’s a bad sign, maybe we shouldn’t be here and turned around to talk to my partners about possibly turning around. That’s when I saw we were all caught in the avalanche and realised that a large portion of the slope we were on had fractured, for as far as I could see at the time, approximately 200-225m wide. WHAT HAPPENED? I initially tried to self-arrest, being close to the crown of the avalanche, and thought I had a chance of stopping myself or at least staying on top of the debris by slowing myself enough that the bulk of the snow would go downhill faster than me, leaving me on top. As soon as I realized I was likely going to stop or at least be on top of the snow I started looking for my partners. The closest partner was still on top of the snow and I watched her ride the snow down almost like she was sitting in a chair. I hadn’t seen her initial struggle while also trying to self-arrest, but watched the slide carry her approximately halfway down the slope. I immediately noticed our third partner, who was around 100ft behind us, was already buried and I hoped to see some part of her re-surface so I could get a reference point while the snow was moving. Unfortunately,I didn’t see anything. I was trying to track both of them simultaneously, but I had a good idea of where the partner who was above the snow was and where she would likely end up if she did get buried. The other buried partner was more of a concern, so I paid closer attention to where I thought she was in the snow and where that mass of snow stopped. The crown spread across two aspects and the way the two slopes funneled together, along with how the slope angle changes abruptly at the bottom of the pass created a large wave that rose up like an ocean swell. It looked like she was probably underneath it. It was clear that it was a deep burial from the start, but I never expected it to be ~4m. WAS SHE UNDER THE WAVE? In a quick summary, I fell from where I had self-arrested approximately 200 meters down the icy layer the avalanche slid on and ended up very close to the partner who was partially buried. We quickly checked ourselves to make sure we were ok, turned our beacons to receive and immediately headed in the direction where the wave of snow had formed. The partially buried partner was ok but still stuck in the snow buried from the legs down. However, she could get herself out so I left her and started the search. My beacon quickly went from 35m to 20m to 12m when I heard my partner say that she had a reading closer to 9m. I immediately headed toward her and the distance on my screen started to decrease, 8m then 6m and then 4m but after that the numbers started going up again. The distance went back up to 5m and then to 6m. I backtracked, reversing back to the smallest reading and checked the other directions—the numbers all increased again, and 4m was the smallest number we saw. It seemed like she was vertically 4m below us. We were both in shock. I had taken two AST-1 courses previously, but they were in 2004 and 2006. I don’t remember much of the details from them, but I certainly didn’t remember them covering what to do if your partner is buried deeper than the length of your probe. One thing I found, however, was the ease at which a new beacon helped me to locate the buried skier. On those avalanche courses I had taken previously I had an old analog beacon and I do remember listening to beeps and the whole process of finding a buried skier being time-consuming and not straightforward in training. Approximately a year ago, I updated my avalanche beacon, primarily because I spend a lot of time in avalanche terrain for fun and work. It felt right to get a new beacon, as having a beacon from 2004 didn’t seem fair to either the people who cared about me or to my partners anymore. The second reason I had upgraded my beacon was because I wanted to be able to use the TX 600 which would allow me to have a secondary beacon for Trango, my dog, that I could search for on a different frequency (456hz) than traditional beacons at 457hz. I didn’t really research new beacons that much, I just knew I wanted something with three antennas and the ability to switch to a different frequency so that I could use the TX 600 transmitter as well, which limited me to the PIEPS DSP Pro (redesigned as the PIEPS Pro BT). IT’S 4M DEEP WHAT DO WE DO? Our memories from this part of the rescue are a bit blurred. There are moments when I don’t remember who did what, but I do remember sitting there going “F&*k she’s buried 4m … we’re f*&ked”. Fortunately, my partner had a longer probe, closer to 3m, but still our beacons were showing 4m. We quickly got our shovels and probes out, put them together and did a quick probing search. We didn’t get a strike and hadn’t expected to either, so we began the process of figuring out what to do. The 4m reading wasn’t from standing, it was when the beacon was placed directly on the snow when we were trying to pinpoint where the buried skier was located. I quickly dug down a shovel depth and put the beacon on the snow again and it read 3.8m. I’ve been taught to test and then re-test, so I did it again, dug down another shovel depth and put the beacon on the ground, and it read 3.6m. From that, we summarized we were headed in the right direction and decided to start digging. We knew we needed an effective area to probe so we dug down approximately a meter and created a probable area that was approximately one meter wide and 2 meters long. We didn’t do this intentionally, I think it was more instinct and logic at the time. It seemed like the right size to be able to find someone. We probed again, and I got a strike after several attempts. It was so deep that I thought it was the ground or a boulder. I had been told previously that a probe strike would feel mushy, like a person or a coat, but that wasn’t the case. It was hard. Had we found our friend or the ground? (Turns out I had hit the upper part of her pack, I think the pack and a Tupperware case may have been what I hit making it seem more rigid then I expected). So, we dug and dug and dug at max pace during the first 20 minutes. I had a heart rate monitor on so it’s interesting to see that graph, basically 90%+ max heart rate during those initial moments. The whole time I was cursing my small shovel … I had the smallest BD shovel at the time when I purchased it, and I was mildly upset with myself for cutting weight on one of the most important of essentials—my probe and shovel—vs leaving out an extra camera battery and other camera related stuff. There was nothing I could do about it at the time other than to make do. HOW WAS THE BURIED SKIER? When I first saw orange under the snow I was in shock again. We had found her! At the same time, I was dreading what condition she would be in. I had been involved in some other situations where I was the first responder and I wasn’t looking forward to that experience with a close friend. Then she made noise. She was alive! Next, we cleared her airway and got some snow out from around her pack, giving her room for her chest to expand so she could breathe. We found the inReach in her pack, activated the SOS and dug her out of that hole for maybe another two hours. When digging, we initially made contact with her close to her head but her lower body and skis were still trapped in the snow. They were down another meter and farther away from us. It took longer than I thought it would to dig her out after we had freed her face and shoulder area because she was still attached to her skis. Our primary objective was to get her an airway and then deal with what came next. We knew that it would take a long time for the two of us to free her. WHAT DID I LEARN? There are definitely a couple takeaways for me that I will apply to my future adventures in the mountains. 1. Read the forecast in detail. The morning of the avalanche I was rushed and did not pay particularly close attention to the bulletin. I saw Low/Low/Moderate and did not read much further. If you read the forecast from that day in more detail it discusses the possibility of triggering the layer we activated on the same aspect we were skinning up. I’d rather not get into another avalanche in the future. The Avalanche Forecast the day of the slide: The details from the bulletin the day of the slide: The forecast the following day indicating the details of our avalanche: 2. Having an understanding of your equipment and how to use it is critical. Fortunately, my new beacon worked exactly like I thought it would—turn it on and follow the arrows—and I can’t imagine what would have happened if it didn’t. I also would have liked to have had familiarity with my friend’s inReach. Being a tech and frequent gadget user, I had thought it would be straightforward to use an inReach, but I was surprised how, under stress, it seemed complicated to use. It’s not, I just couldn’t figure it out, fortunately my partner was smart enough to read the instructions on the backside of the device and initiate the SOS. 3. Previously, I have openly stated that I would never buy a probe longer than 3m because no one will live under 3m anyway. Statistically, that’s a pretty true statement considering survival rates at 2m are only 3%. Two days after our slide I purchased a new 320cm probe. I learned my lesson. Being a photographer, I always have a DSLR, an extra lens and an extra battery or two in my pack but I was skimping weight on the equipment that can save a friend’s life. Next time I won’t carry the extra camera battery and carry the longer probe instead. 4. I’d say the same thing about the shovel. I have a larger shovel, but I tend to take that on trips that are overnight, where I’ll be making snow walls and doing a lot of digging, rather than for day missions. I had a smaller shovel that day to save on weight. I won’t be carrying the small one on similar tours anytime soon. I’ll just try a bit harder and carry a few more grams/ounces of kit. At one point while digging we switched shovels briefly and it was apparent to me that having a larger shovel would have helped in our accident. 5. I’ve become a little more cautious about new partners I head out with and the terrain we are choosing. Many people are meeting their partners online for the first time and I think that’s great! However, I wouldn’t want to be in avalanche terrain with someone I just met online. This is new for me, and I used to be more carefree about who I went into the mountains with, but after having gone through this slide I think I’d prefer having someone I trust searching for me if the scenario was reversed vs someone I met at a coffee shop for the first time that morning. ANYTHING ELSE? A couple of Avalanche Associations reached out to me and asked about what I thought the importance was of watching the snow where I thought the buried skier was while the snow was still sliding. I thought this was critical to our timing in finding her, as there wasn’t much screwing around once we started searching and we were within 10m of her in the first minute or two because we had an idea of where she was buried.
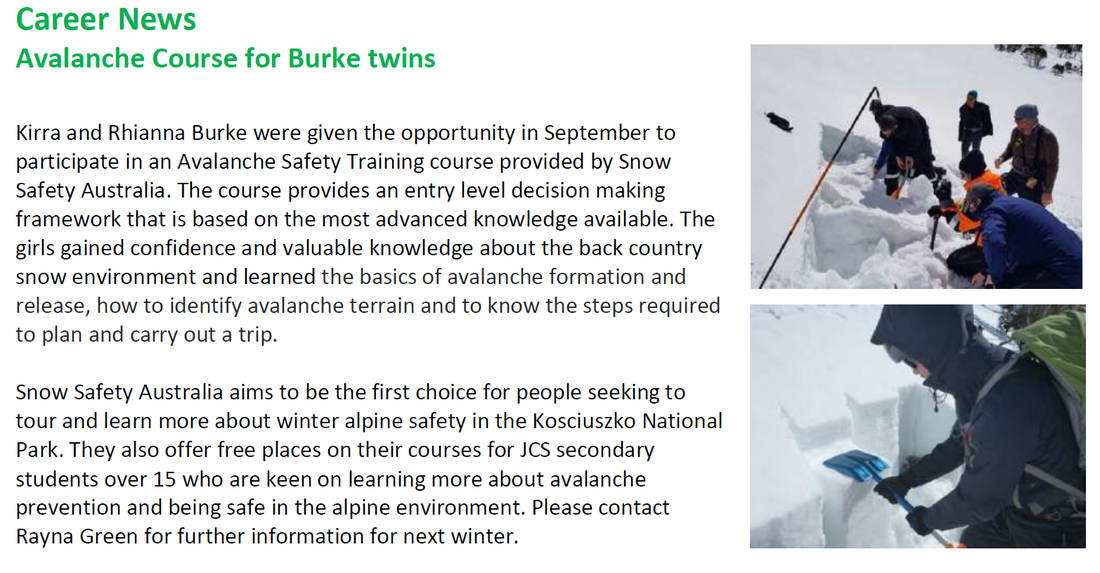
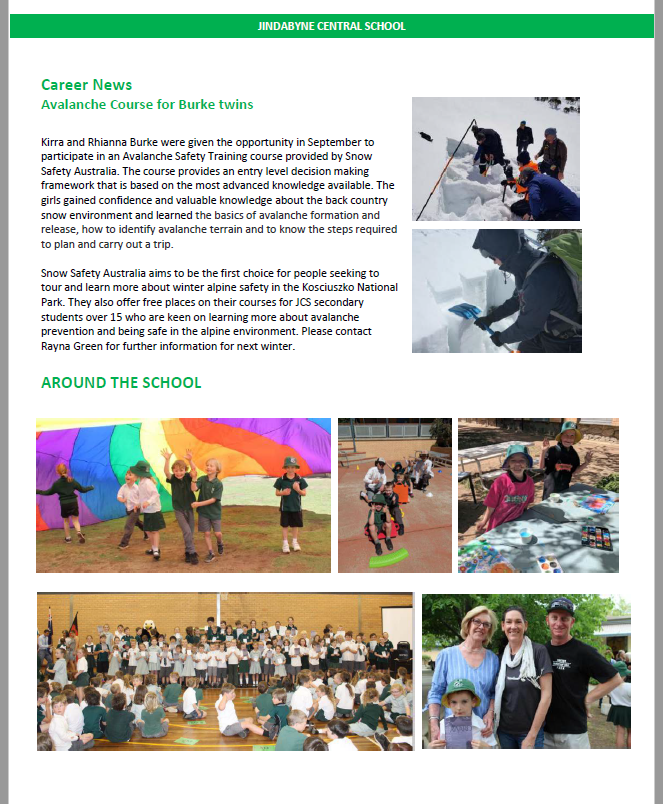
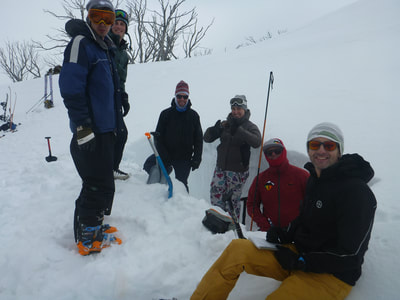
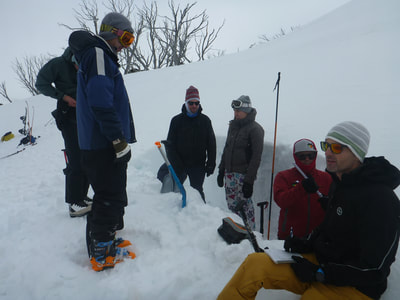
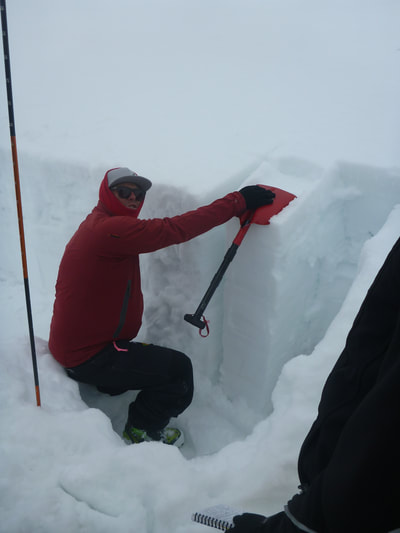
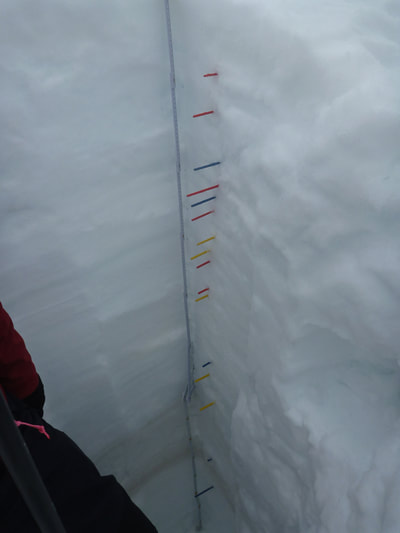
In a 2012 study by Pascal Haegeli at Simon Fraser University in Vancouver, Canada, which compares Canadian to Swiss survival rates based on burial times, it was shown that in Canada, as the burial time increases you are significantly less likely to survive an avalanche. That’s expected, and the overall window of survival is closer to 10-18 minutes. To me, this stresses the importance of finding your partner fast and I believe that watching the snow and having newer generation beacons attributed to this. There were human factors that lead to our incident, and I think fully reading the forecast, including the written details could have changed what happened that day. Certainly, if I see Low/Low/Moderate again I won’t assume that everything is fine and I will read deeper into the avalanche bulletin. I am considering carrying a second communication device more often in the future too. That might be too much gear for a light and fast alpine route, but for other routes I can see it making sense. I figure that I can carry an extra VHF radio or sat phone for the group, in addition to the inReach that someone else normally has. If we would not have been able to get to the buried skier’s inReach, it would have complicated our day being several hours from the road. This may not seem apparent, but don’t rush getting to the buried skier and risk getting hurt as the rescuer. Without two rescuers in our scenario, the outcome would have been different. I was able to self-arrest on the icy layer but then fell the length of the slope. Falling probably saved us time getting to the buried skier, but this easily could have gone differently. I have heard of incidents where rescuers are above the crown with buried partners far below at the base of the slope. I think chatting about not taking the additional risk of getting hurt as the rescuer and how an additional injury can create issues in the rescue is warranted; we were lucky. BOTTOM LINE Having two fit rescuers and a good understanding of what to do once the snow stopped moving helped when everything went wrong. We were fortunate to pull off such a deep companion rescue. This avalanche will change a few things I do in the mountains going forward. --Tim Banfield Our youth program from 2018 got a write up in the school newsletter
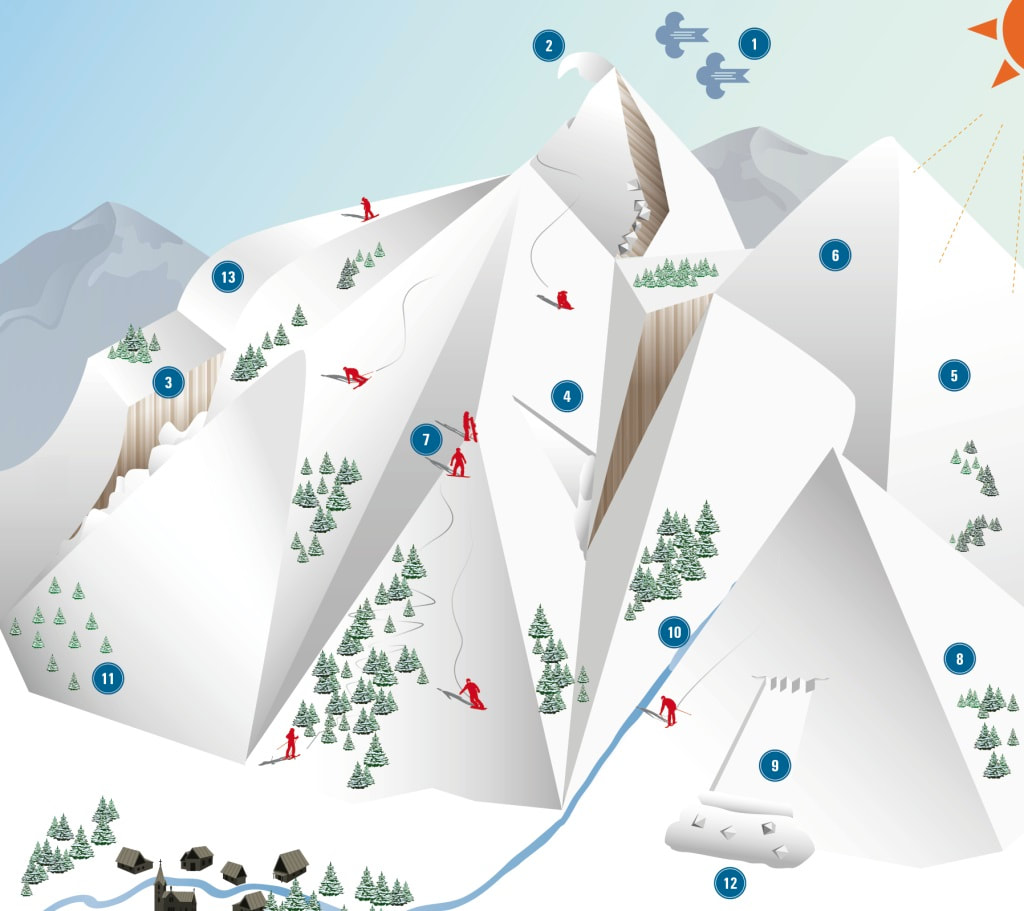
www.snowsafety.com.au/youth-program.html On the picture below you see 13 points that every freerider should consider before making a decision. Not only to be safer in the mountains, but also to prevent getting wet feet in a creek and especially to ride more powder. With the right knowledge and expertise you can always ride powder somewhere. Do you already have some knowledge of weather, snow, avalanches and the mountains? Then write the points 1 to 13 on a blank piece of paper, check the picture below and write down for yourself what they could mean. Then just scroll down and check whether it is slightly correct. Lets see how your good your mountain knowledge is ?
1. Wind "Wind is the builder of avalanches". Wind transports large amounts of snow and because wind destroys and reduces snowflakes while moving, it's the cause of so-called 'wind-blown snow'. Wind is not good. If the wind is strong or has been strong over the past few days, there is an increased risk avalanche risk. 2. Corniche Large corniches are a clear indication the wind was strong. A corniche is always away from the wind (Lee) and gives you an idea of the prevailing wind direction. Paradoxically, the first fracture rarely arises directly on or just behind the corniche. There is so much snow here that the chance that you hit a weak layer is very small. It is just a few to tens of meters below it where it becomes dangerous, because the snow cover there is usually slightly thinner and you hit the weak layer more easily. 3. Rocky faces Wind stills arise in the vicinity of rocky faces due to the ruggedness of the terrain. You will always find wind-drifted snow near rocky faces (also smaller rocky faces) and especially below rocky faces. And that means an increased avalanche risk. Descend above a rocky face? An avalanche can throw you off with all its consequences. Take wind-blown snow and terrain traps into account! 4. Loose snow avalanche A loose snow avalanche starts at one point and then takes the form of a cone. A snowflake decides to roll down (often triggered by your skis or snowboard) and a chain reaction takes place. A loose snow avalanche is the ultimate example of the snowball effect. The loose snow avalanche is a variant that is generally not as dangerous for freeriders, but should not be underestimated. The biggest danger of loose snow avalanches is that you get out of balance and possibly slide off a cliff that's too big to huck. 5. The sun The direct radiation of the sun ensures that the snow cover can set itself after a period of time, which makes the snow cover stronger. But the sun does not reach every part of the mountain. Especially in the middle of winter the sun is so low that it does not shine directly on many faces. Where the sun can not reach the mountain it remains cold and weak layers in the snow cover can stick around for months. On the other hand, the sun can provide a crusty layer that can serve as a sliding layer after new snowfall. 6. Surface hoar Surface hoar doesn't fall down from the sky, but is created on the snow cover itself and consists of large crystals, often in the form of feathers, wedges or some kind of icy flakes. Surface hoar is therefore not a form of precipitation, but rather a consequence of a cloudless sky during the night. Surface hoar itself is not dangerous, just like hail and Graupel, when it forms the top layer. It immediately becomes dangerous when a new layer of fresh snow falls on top of it. The layer with surface hoar is no longer visible. Layers with surface hoar are extremely weak and are a typical sliding layer for an avalanche. The biggest problem with a thick layer of snowed in surface hoar is that it can take weeks and sometimes months before the situation is stabilised. 7. Riding tactics Before you ride down, it is good to determine the safe zones on the face. Safe zones are useful so that you can keep an eye on each other. A good riding tactic prevents you (and the whole group) from getting into trouble. 8. Slope angle The ideal slope angle at which avalanches come down is 38 degrees steep. In any case, most avalanches take place on slopes between 20 and 55 degrees. Those slopes are perfect to ride. These are the types of slopes in which we cause the deadly avalanches ourselves in 90% of the cases. 9. Slab avalanches Small slab avalanches can cause the snow cover to destabilise even more. Small cracks can continue to move invisibly and trigger large(r) slab avalanches. 10. Terrain traps Terrain traps, or the 'traps' plotted by the terrain are those places on the mountain where you 'fall into the trap'. If you come in an avalanche and it comes across a terrain trap or when an avalanche ends up in such a terrain trap, then the chance of survival is considerably lower because the snow piles up high. 11. Avalanche gullies Closed forests in which white channels flow down. These openings in the forest are a direct danger to you. These paths are not 'gladed' so that you can go skiing or boarding. These are the paths of spontaneous avalanches that descend every now and then. Small, young, widespread trees, especially those with branches that only grow downhill, are a typical sign that avalanches are regularly coming down here. 12. Save your buddies after an avalanche? Practice, practice, practice Avalanches that end up on flat sections are made of hard chunks make it difficult to carry out a rescue. It's simple: practice, practice, practice! 13. Convex slopes The snow cover is often not so coherent on a convex slope, also called a rollover. The combination of gravity - to pull the snow down - in combination with the curvature of the slope ensures that we regularly see avalanches at the point where the convex is the strongest.
A good friend of Snow Safety, Jake Sims is one tough bloke! So happy to him still charging large lines in Australia.
"Jake is a father and war veteran who suffered a stroke last year and came very close to loosing it all. He made an amazing recovery, although he had to learn to snowboard again. His passion for the backcountry and drive for life is incredible, a true inspiration" Chasing Time from Kyle Genner on Vimeo. Life had got complicated fast and priorities had shifted for Lach, a life-long mate and new father, but the underlying froth for snowboarding was evident in the weeks leading up to his leave-pass weekend. Young Jack was put to bed... we hit the road.
It was a narrow weather window, there had been a recent storm and crystal balling the forecast indicated a half day with a high freeze level front and possibly white-out fast approaching. It wasn’t an ideal weekend to be heading out in honesty, so we prepared for the worst and made the most… We rounded the Twynam dome; the shredable lines of the Siren Song face emerged from the rolling landscape - somehow impressing on-lookers even after repeat visits. Rocks were rimed, snow was scoured and the best face to ride was still being juggled in the mind. We approached the Knoll and new hints appeared - unexpectedly, consistent patterns of wind loaded powder of 20-30cm depth became evident. The juggled balls landed and lines to ride suddenly became clearer - some gems were in the mix for sure! We skinned on and one particular face likely to be on was mentioned, a mountain face that requires caution - it was wind-loaded, there are rock bluff hazards below, and you end up in a remote corner far from any rescue team. There was apprehension in Lach’s response.....a shift from previous trips we’d been on – I could tell he was thinking of young Jack smiling his 9 month old smile. With the front approaching, we needed intel and we needed confidence of a safe return to family. We scoped and talked through hazards, safe zones, snow-pack and checked beacons....a breath…I dropped in, tender turns avoiding a convex pocket into the chute entrance and I bee-lined it to protection. Stability was evident and I continued into the chute - wide enough to open it up a bit and narrow enough to keep it interesting. It was loaded with wind-blown powder, sluffing, but stable. I linked a turn under mid-face protection and called Lachy in on the radio......A handful of linked turns and Lach flew past at warp speed hooting with stoke – although he’d had a break from snowboarding, the years in Chamonix and free-ride skills instinctually came to the surface. An elevating freeze level narrative spoke through the ice fall as we exited Crags Creek, dense cloud cloaked over and we were in a vertigo matrix of whiteout. We navigated that matrix back to the dome and home, keeping glimpses of the corniced ridge at a safe distance, contemplating how scary it would be to do this in a glaciated landscape or a knife edge ridge. The stoke was high...a rare treat it was to slay such perfect stable powder on a complex Aussie mountain face...practicing team work skills, spotting and watching a good mate slay it too. It doesn’t get much better out there, we were happy that our preparations were up to the conditions on this day and realised how lucky we were. Lach confided his thoughts of free-riding in relation to Jack and family on the return trip – it’s important to keep life priorities in check out there… Words from Antony von Chrismar 3D avalanche from Snow Safety Australia on Vimeo.
By Greg Hill
In 1999, while I was beginning my backcountry adventures I was fortunately unfortunate to witness a major avalanche. I know this sounds odd but as a young wild adventurous boy I was fairly oblivious to the true hazards of the mountains. I was young fit and driven to explore but really blind to the mountains. I had enough self-analysis to understand that I knew nothing so I took my Canadian Avalanche Level 1 course. It was during that course that I witnessed a class 4 avalanche and was part of a full blown rescue. Sadly Shane, an acquaintance, passed away in this slide; also a great friend, Frank, suffered multiple fractures. I remember standing on the side of Mt-Macdonald, watching the last patient being long lined off into the setting sun. While watching them fly away I vowed that I would learn as much as I could to avoid such a catastrophe happening to me or the people I ski with.
This video “ my rules”, are my rules to minimize these risks, because I know that I cannot stop and will not stop going out in the mountains and taking risks. It is such a big part of who and what I am. Yet I can do it in a way that is smart and has a process to it. I am not blindly wandering around.
I made this video for the simple purpose of scaring people a little bit and getting them to think and understand the risks they are taking. This is a first in a little series of videos I am making. The second I am calling “tricks of the terrain” it is a more on the ground approach to backcountry skiing. These little tricks that have been taught to me by my mentors and by the mountains. Ideally the rules I share and the tricks I teach help you make good decisions in the mountains and enjoy them for years to come. My 5 Rules from Snow Safety Australia on Vimeo. MAIN RANGE NSW:
RECENT OBSERVATIONS UPDATED: 19TH / AUG /2018 REPORT CONFIDENCE: STRONG CURRENT UNTIL: 20TH / AUG / 2018 OBSERVATION SUMMARY TREND: DETERIORATING RECENT OBSERVATIONS CONSIDERABLE AVALANCHE DANGER. SUNDAY Field observations in today are of natural and skier triggered avalanches size 1 over the entire Main Range down to 35cm. Lots of new snow today falling at 2cm / hr. The lee slopes will have 3-5 times more loading so be care as slide are happening in these zones. Slides were triggered and witnessed on 25 deg slopes so even simple terrain is unstable ATM SATURDAY FIELD OBSERVATIONS Heavy snowfall today and continuing over the weekend . The new 30 cm of snow will be more like 50 by Sunday and this will be sitting on a melt freeze layer. Below this melt freeze layer is a touchy layer of buried surface hoar, so we could see large slabs on lee slopes. Snow falling to 900m on Saturday night so the whole Main Range will be getting some love from the snow gods. OUTLOOK This added weight on the snowpack will most likely see natural avalanches on steep loaded terrain. The Buried surface hoar below the 15cm of melt freeze will continue to be a issue moving forward so we will continue to monitor its bond strength. Stay in simple terrain and steer clear of terrain traps and natural hang fire while skiing and touring. Enjoy the touring on the weekend and stay safe. |
Archives
March 2022
AuthorSnow Safety Australia is a NSW based information website. Categories |
Training Courses |
Company |
|




 RSS Feed